Prerequisites
- An n8n instance (cloud or self-hosted) with the AI Agent node available
- A Prior Labs account and API key — see getting your API key
- An API key for your LLM provider (this tutorial uses Anthropic, but any supported model works)
- TabPFN MCP server configured in your n8n agent — see the n8n section of the setup guide
What you can build with this
Once you have an n8n agent connected to TabPFN, you can wire it into any n8n automation. A few examples:
The workflow in this tutorial handles the CSV upload and prediction part. You can extend it with additional n8n nodes for whatever comes after the prediction.
Overview
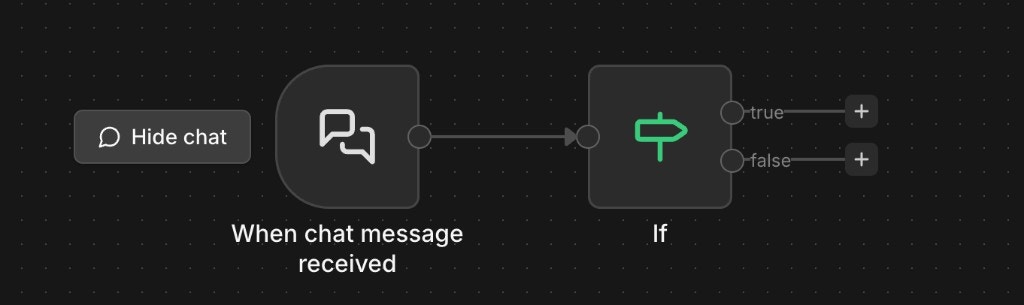
Here’s the finished workflow: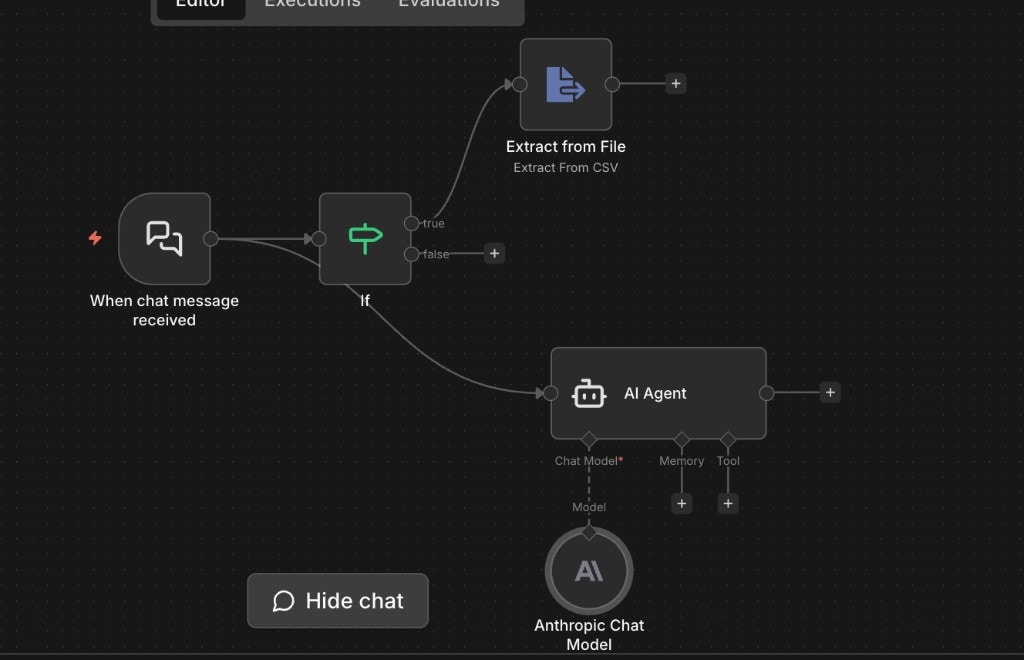
- A chat trigger receives messages and file uploads from the user.
- An If node checks whether the message includes a file.
- If yes, an Extract from File node parses the CSV into structured data.
- The AI Agent — connected to TabPFN via MCP — handles the conversation, receives the parsed data, and runs predictions.
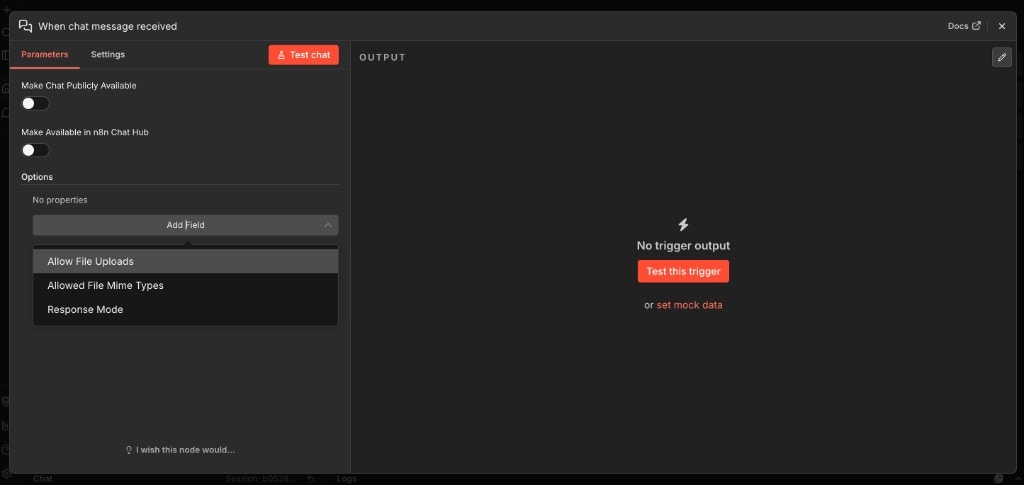
Step 1: Chat trigger with file uploads
Create a new workflow and add a When chat message received trigger node. Open the node, click Add Field under Options, and enable Allow File Uploads. You can also add Allowed File Mime Types and set it totext/csv if you want to restrict uploads to CSV files only.
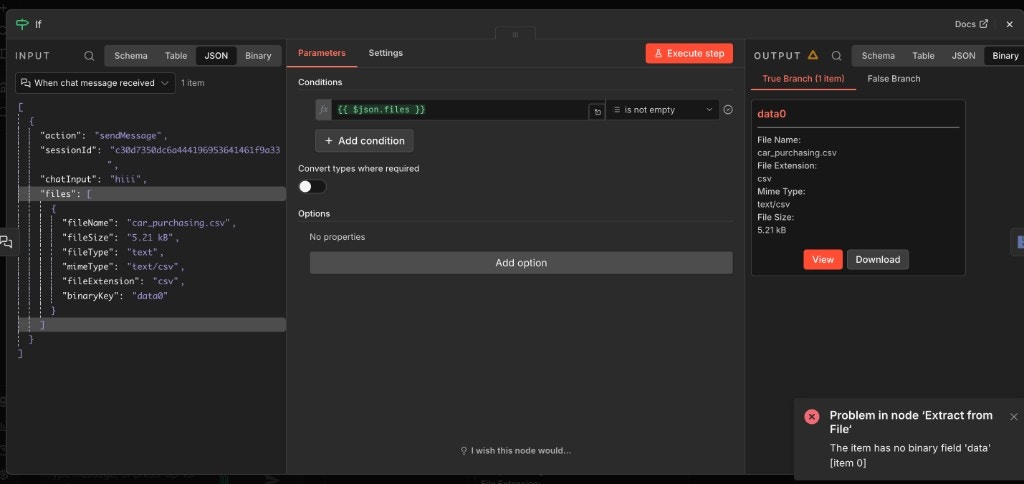
Step 2: Route based on file uploads
Add an If node connected to the chat trigger output. Set the condition to check whether the incoming message has files attached:- Field:
{{ $json.files }} - Condition: is not empty
files array in the trigger output will contain the file metadata and binary data. Messages without files go down the false branch.
If you need to handle multiple file types (Excel, JSON, etc.), add a second condition or a Switch node after the If to route each type to its own extraction node.
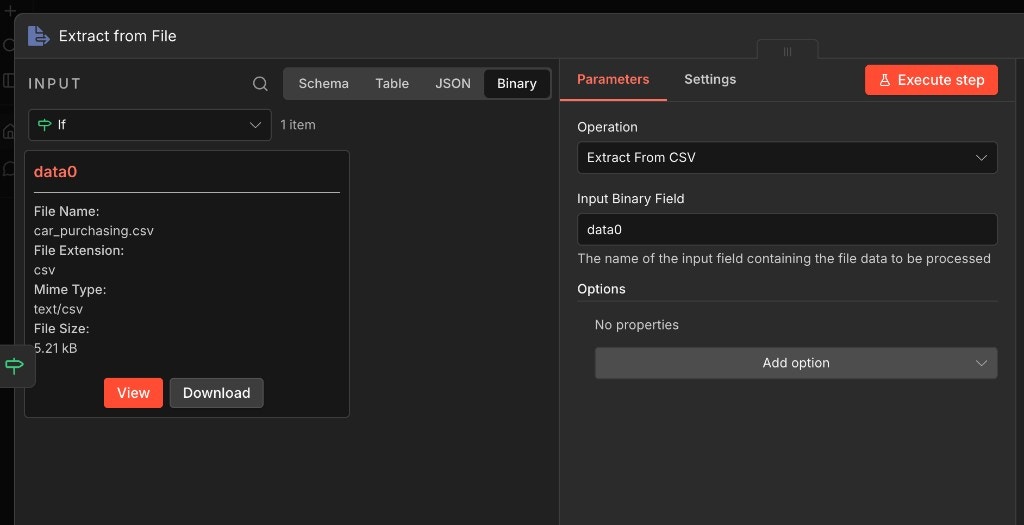
Step 3: Extract CSV data
Connect an Extract from File node to the true branch of the If node. Configure it:- Operation: Extract From CSV
- Input Binary Field:
data0
data0, the second would be data1, and so on. The Extract from File node converts the binary CSV into structured JSON rows that the agent can work with.
Step 4: Connect the AI Agent
Add an AI Agent node to the workflow. Connect it so it receives data from both branches:- The true branch (after Extract from File) feeds in the parsed CSV data.
- The false branch passes through chat messages that don’t have files.
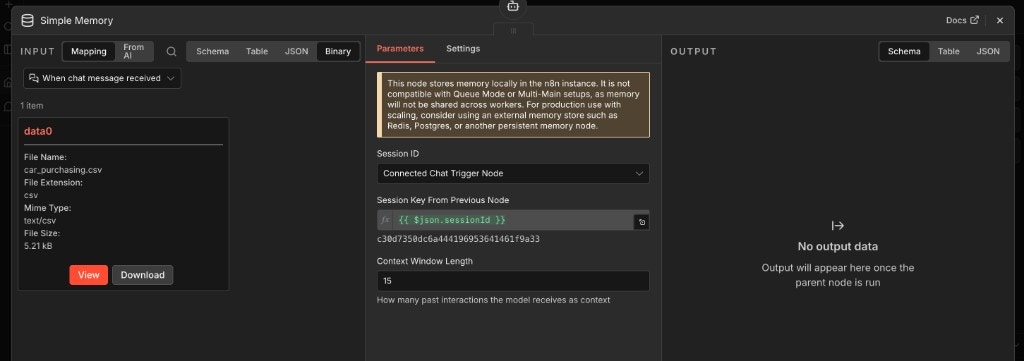
Step 5: Add conversation memory
Add a Simple Memory node and connect it to the agent’s Memory input. Configure it:- Session ID: Connected Chat Trigger Node
- Session Key From Previous Node:
{{ $json.sessionId }} - Context Window Length:
15(or adjust based on how much conversation history the agent should retain)
Step 6: Connect TabPFN via MCP
Add the TabPFN MCP server as a tool for the agent. If you haven’t set up the MCP connection yet, follow the n8n setup guide video first. Connect the MCP tool node to the agent’s Tool input. The agent will have access to TabPFN’s tools for uploading datasets, fitting models, and generating predictions. See the full tool reference for available operations.Step 7: Configure the agent prompt
Set the AI Agent’s system prompt to tell it how to use the TabPFN tools. We maintain a ready-made skill file that covers the full workflow — data validation, tool selection, edge case handling — so you don’t need to write this from scratch. Grab theSKILL.md from the TabPFN Prediction Skill tutorial and paste its contents into the agent’s system prompt field. The skill was written for Claude, but the instructions are model-agnostic — they work with any LLM that supports tool use.
You can use the skill as-is for a general-purpose prediction agent, or trim it down for a narrower use case. For a lead scoring workflow, for example, you might hardcode the target column and task type so the agent doesn’t need to ask.
Test it
Click Test chat in the n8n editor. Send a message with a CSV file attached — something like:- Confirm the target column and task type
- Upload the CSV to TabPFN
- Return predictions